Wednesday 6 August 2014

Say What?!?!

I couldn’t wait to start playing with the Just Sayin' stamp set (133203) and the coordinating Word Bubbles dies (132968). I love the modern look that these give a card so I stamped a full set and cut them all out.

Love Ya card

  • Firstly, I got a square Kraft card blank and I took my speech bubble and put it aside.
  • Next I took some inspiration from some cards I had seen on pinterest using this set and cut out a banner shape using Tempting Turquoise cardstock and cut a heart out using Real Red cardstock.


  • I then embossed the blue banner with a polka dot pattern and stuck it to more Real Red cardstock and cut a border around it.
  • Next I stuck the heart on the front of the banner and put the Love Ya bubble on with some 3d foam pads.

5

  •       Finally, I added a few red gem stones in the corner to finish the card.


Supplies Used:
Kraft Card Blank
Polka Dot embossing folder
Heart Die Cut
Just Sayin' Stamps - 133203
Word Bubbles Dies - 132968
Gemstones
Whisper White Cardstock - 106549
Brights Cardstock - 131282
Black Ink Pad
Adhesives

Hey There card

I loved the fuss free look of this card as soon as I saw it and knew I wanted to make it for myself. Here’s how I did it.

  •  I got a blank white 5”x7” card blank and cut a piece of whisper white cardstock 4 ¾” x6 ½”
  • Using the Hello Honey (133643) and Tempting Turquoise (126952) colour stamp pads and the Gorgeous Grunge stamps (130517), I first stamped the yellow lined stamp and then did 3 of the turquoise splatters on top.


  • I rounded the top two corners of the piece of whisper white card.
  • Next I stuck the speech bubble on top of the stamped area.
  • I put 3 white gem stones just to add a bit of bling.


  • Using some black cardstock, I added a ¼” straight border piece along the bottom of the piece of card. 


  • Finally I stuck the piece of card onto the front of the card blank with some 3d foam pads to give it a bit of a lift.


Supplies Used :
5" x 7" card blank
Whisper White Cardstock - 106549
Hello Honey Ink Pad - 133643 
Tempting Turquoise Ink Pad - 126952
Just Sayin' Stamp Set - 133203
Word Bubbles Die Cutters - 132968
Gem Stones
Black Cardstock

After making these two cards, I have to say that I am impressed by how easy the stamps and dies were to use. I’ll definitely be using  this set a lot!


Wednesday 16 July 2014

Quick and Easy Cards

Pennant Card

Here’s a really quick and easy card that you could adapt for almost any occasion.

1. Take some type of stick (I used cake pop sticks) and cut them into three different lengths. Tie a piece of bakers twine on the longest one and stick them down to your card.
2. Punch your banners in coordinating colours. Stick them together and then add them on with foam pads to give them a bit of lift.


3. I made a banner greeting by just stamping my greeting on a piece of plain white card and then framing it with a bright colour. 

Ta dah, there you have a super quick and simple but effective card. You could even jazz up the pennants by sticking flowers or gems to them or even a tiny greeting.

Products used –
Designer Series Paper Stack (brights) 130134
Cardstock
Adhesive
Cake pop sticks
Memento Ink Pad 132708

Happy Birthday Rainbow Card

This card was an idea that I saw and adapted from one of the Stampin’ Up! Catalogues and I loved the rainbow colours. I think they really stand out. 

1. First you have to stamp the greeting as many times as you want in the colours you choose. You either need a good eye for this or a stamp-a-ma-jig (101049) to get them as lined up as you can.
2. Stick your greeting strip on to the front of the card. 

3. Next, I made up a decorative strip with a piece of Stampin’ Up! Patterned paper and a scallop punch with another piece of paper. I stuck these on so they covered the join of where the piece of rainbow greetings had been stuck down.


4. Finally I stuck piece of ribbon and a star shaped button on to finish the card.


I love the bright fun colours of this card.

Products used –
Whisper White Cardstock
Brights A4 Cardstock 131282
Classic Stampin’ Pads (in bright range colours) 131182
Scallop Edge Punch
Designer Series Paper Brights 130134
Ribbon in Melon Mambo
Star Button
Adhesives

Love Love Love Card

The heart stamps in the I {Heart} Hearts set are so stunning that I wanted to show them off in a way they deserved. I think they may be retired now but there is a lovely new set called Groovy Love (134246) which is very similar and could be used in the same way.

1. First I stamped the hearts on to some white cardstock and cut them out.
2. Second, I cover almost half the card with some cardstock and a piece of scallop edge card.


3. I then stuck the hearts on, some with double sided tape and some with foam pads to add a bit of dimension.


4. Next, I made a banner greeting tag with a little “love” stamp from the Pennant Parade set and some matching cardstock.
5. Finally, I added a row of gem stones in the bottom corner to finish off the card.


I love how easy it is to get everything so coordinated with the colour families that Stampin’ Up! Have created. It means you can get cards done quickly and not have to search though all your craft supplies for things that match.

Products used –
Whisper White Cardstock
Brights A4 Cardstock 131282
Classic Stampin’ Pads (in bright range colours) 131182
Scallop Edge Punch
Designer Series Paper Brights 130134
I {Heart} Hearts Stamp Set 118571
Pennant Parade Stamp Set 122742
Adhesives
Gem Stones

Saturday 5 July 2014

Putting my stamp on Stampin' Up!

So it has been a loooooooong time since I've posted on here and a lot has happened in those few years. I've got two gorgeous little kiddies, Mollie, who will be 3 next weekend ( I can't believe it) and Cameron who is just over 10 months and is very much on the move. They keep us busy but we love it!

So I decided it was time to get back into my crafting as I love it so much and I'm so excited to have signed up to be a Stampin' Up! demonstrator. I'll be using my blog now to display some of my fun cards and give some easy steps on how I created them. I hope you will all join me on this fun new adventure.... I can't wait to get started!!!

I'll be back soon, I promise!

Ruthie x

Friday 8 October 2010

It's Been A While....

...but i'm back and ready to post a few more layouts. Here's one I did tonight, only a couple more pages to finish my London book.Credits: Black & White Basics Paper Pack, Tack it Down and Space Ranger by Britt-ish Designs, Mansion Masquerade Solids by Britt-ish Designs, Sahlin Studios, DeCrow Designs, & Tangie Baxter Designs, What John Saw by Melissa Daniel Designs, In The City Alpha by Sahlin Studio, and Mr & Mrs Date Stamps by Haynay Designs


Credits: For The Boys by Amanda Heimann & Wild Dandelion Designs, Bright Happy Funny, Fish Are Friends, Space Ranger, and Just Plain Fun Templates by Britt-ish Designs, Monster's In My Closet Alpha by Laurie's Scraps


Credits: Enjoy the Moment by Sahlin Studio, and Mousestitches & Mouseterpiece Alpha by Britt-ish Designs
That's it for tonight. I'm working on a few other hybrid projects for going to Disneyland Paris in 3 weeks so I'll try to get them posted before I go.
Have a good weekend,
Ruthie x

Saturday 31 July 2010

Wicked times!!!

Here are a few more pages I've done recently. I'll start with the one I did for Andrea's challenge this week on mousescrappers.com. I love these challenges because they make me do pages I wouldn't normally and I'm finally getting near the end of the Honeymoon album.


Credits: Challenge 25 Template from Kat Designed, Smooches by Ziggle Designs and Amanda Heimann Designs.

Here's another one I did using the Smooches kit with one of Britt's templates. I think this is my favourite page I've ever done...I loved this moment and I think the template and kit just fit it perfectly.

Credits: All for One Templates & Jellies:Frames by Britt-ish Designs, Smooches by Ziggle Designs and Amanda Heimann Designs, Scatters from Santa Baby by WMSquared Designs

Finally, another London layout. Only a couple more til I can get it printed. I really wanted to do this one justice as we both LOVED this show. I'm pretty happy with how it turned out.


Credits: Witchy Woman, Polka Dots for Boys & Paper Shapers: Fun Mats by Britt-ish Designs

Ok well that's all for today. Hope everyone has a lovely weekend!
Ruthie x

Wednesday 28 July 2010

Minnie Marathon Weekend...and a few more!!!

Ok, let me start with some of the pages I did for the Mousescrappers Minnie Marathon Speed Scrap at the weekend. I was lucky enough to participate in 9 of the 10 scraps so it was great to get so many pages done. I'm running out of photos and inspiration for the rest of the honeymoon so I started on a couple of pages from Paris from our October 2008 trip:


Credits: Template from EZ Templates 9 by Erica Zane, All Hallows Eve by Trixie Scrap Designs, A Halloween Nightmare & Mouse Stitches by Britt-ish Designs

Credits: Sunny Side Up by Chelle's Creations, Chip & Dale Acorn Club Word Art from Natalie's Place Designs, Easy Being Green Alpha, Tack It Down, Paint Stroke Glam, & Black & White Basics Paper Pack by Britt-ish Designs, Green Splatter from You've Got A Friend by MandaBean, M&M Dotty Papers by Fran Bunny Designs, Tickle Me Pink from Designs by Julie Bullock

I did also manage to get some more Honeymoon trip pics scrapped too:
Credits: Template from iNSD collab templates by Haynay Designs, Black & White Basics Paper Pack, Jellies: Blooms, and My Handiwork Flowers by Britt-ish Designs, Magic of Magenta Freebie by Natalie's Place Designs, After Dark Freebie by Sahlin Studio, Defining Me Glitter Paper Add On by Trixie Scraps Designs

Credits: All for one Templates, It's Good To be Bad Alpha & Date Stamp Classic by Britt-ish Designs, Too Cute to Spook by Suzy Q Scraps, and Ever Ever After by Jamie Dell Scraps

Credits: Template from EZ Templates 10 by Erica Zane, Animal Kingdom, Mouse Stitches, and Delicate Mickey Sprinkles by Britt-ish Designs

Credits: Template from Going in Circles - Set 2 by Sya's Blueprints by Aisyah Roslan, After Dark & Freebie & In The City Alpha by Sahlin Studios, Magic of Magenta by Natalie's Place Designs


Credits: Animal Kingdom by Britt-ish Designs

Credits: Pop & Fizz by Stolen Moments, All That Glitters Paper Pack by Chelle's Creations

Credits: Beach Bum by WM Squared Designs, and Jellies:Frames, Flair Dates, and She's Got Even More Curves by Britt-ish Designs

Somehow I also managed to get two more pages of my London book done too...only a few more pages and I can get this one printed off.....Yipee!!!!

Credits: Template by Leslie Bodoh digital scrapbook designs, Polka Dots for Boys, Witchy Woman by Britt-ish Designs, Opening Night by Britt-ish Designs & Stolen Moments Designs, Ticket to Ride by Chelle's Creations, Oh Happy Day by Any Stoffel, Tennis Ball 4 from scrapbookpresentations.com


Credits: Bright Happy Funny, Collectible Cardboard, Stash Staple: Solids Pack 1, Minnie Alpha, Date Stamped, and Tack It Down by Britt-ish Designs, and Winter Wonderland by WM Squared Designs

Well that's all for now. I'm hoping to get some more done this week and will post them once I have. I also really want to get some paper scrapping done too....i feel i'm neglecting it.
Take Care,
Ruthie x

Saturday 17 July 2010

Another Crafty Weekend...

and I got another few digital pages done and some cupcakes stamped to make some cards.

Here's what I've done over the last couple of days. Just finished this Hard Rock Cafe double pager:
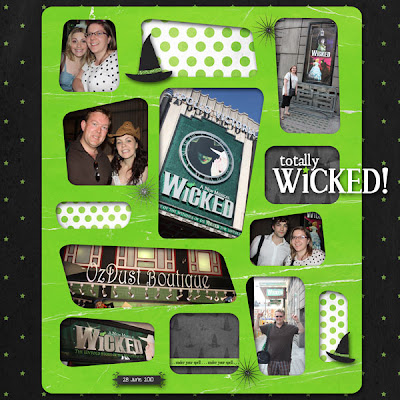
Credits: Template from double templates by Scrapping With Liz, For The Boys by Amanda Heimann & Wild Dandelion Designs, A Magical Place & I Love Rock & Roll by Connie Prince, Music of the Night by Jamie Dell Scraps, Date Stamped and Black & White Basics Paper Pack by Britt-ish Designs, Sunny Side Up by Chelle's Creations and A Most Magical Alpha by Happy Scrap Girl Designs.


Credits: Smooches by Ziggle Designs & Amanda Heimann Designs, Winter Wonderland by WM Squared Designs, Bright Happy Funny by Britt-ish Designs, and Date With a Mouse by YB Designs.


Credits: Collectible Cardboard by Britt-ish Designs, A Magical Place by Connie Prince, Enjoy the Moment Add On by Sahlin Studio and Date With a Mouse by YB Designs.

Ok that's all for tonight...gonna get to bed.

Ruthie x